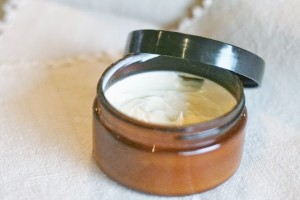
Summer is coming and along with it nice skirts, shorts and a little more bare skin. Who wants smooth, soft skin? I usually find that once my family hits the beach, we usually start using copious quantities of moisturiser all round. When my little ones are lathering it on their precious skin, I really like to know that what they are using is all natural. Most moisturiser we buy have a petroleum base. Yuk!
Imagine if you could make your own hand cream and moisturisers. With a Thermomix it is easy!

It is amazing to think that with a Thermomix in your kitchen you can whip up a couple of pots of luxurious moisturiser in about ten minutes. Since what you put on your skin gets absorbed into your body, it’s nice to know exactly what is going into it.
When you start to make your own moisturiser it becomes obvious just how much water it contains. When you buy an expensive moisturiser from the shops, most of what you are buying is water!
Before you make your moisturiser you need to purchase a few ingredients. Most of them you will be able to buy from a health food shop but two you will have to source specifically; Vegetable Glycerin and Emulsfying Wax. These are both available from specialty stores such as Auroma, New Directions and Aussie Soap Supplies. You can also purchase the other ingredients from them, in bulk quantities and at cheaper prices than you would from a health food store.
To give you an overview of how a lotion is made and why the Thermomix is so suitable I will briefly explain the steps. A lotion is an emulsion between an oil phase and a water phase. A successful emulsions requires both phases to be heated to 70′. The water phase is then added to the oil phase with significant agitation (think of making mayonnaise). It is both the blending function and the precise temperature control that make the Thermomix so ideal.
There is a lot of flexibility with quantities and ingredients and so the recipe below is more of a guide than hard and fast instructions. Experiment with different oils, different ratios and see what you like. One thing I would always recommend is that you keep a little notebook with each variation you make and the date. There is nothing more frustrating that finally finding the right mix and not remembering the recipe!
I doctor up each little jar to suit the end purpose or recipient. For example, I make several small jars for my children simply to use as a carrier for their essential oil blends. I have one for sleeping, one for mosquito bites, one for studying etc. They each have a little first aid kit in their bedrooms. Then I make up a cream for my husband, it is scented with more masculine oils. Into my own I love to add some of the more nourishing oils like rosehip and camellia with some essential oils like lavender, orange and rosemary.
- Ingredients - this recipe can easily be doubled
- Water Phase - around 70%
- - 130ml filtered water
- - 10ml vegetable glycerin
- Oil Phase - around 30%
- - 50ml oil of your choice; almond, olive, jojoba, coconut are all great
- - 15g emulsifying wax
- - ¼tsp citrus (any kind) seed extract - a natural preservative
- Essential oils of your choice
- To start you want a very clean Thermomix so that there is no contamination. I wash my Thermomix bowl with 100ml of vinegar and 500ml of water and heat on Varoma, 5mins, Sp 4.
- Fill your Thermoserver with hot water to heat briefly. Tip out before use.
- Place the filtered water and glycerin in the TM bowl. Heat to 70'/2 minutes/Sp 3
- Pour into empty Thermoserver to keep warm.
- Add oil phase ingredients to TM bowl making sure the wax pellets aren't sitting on the blades (or they won't melt). Heat to 70' 2 minutes, Sp 3.
- Insert butterfly and place lid on top with MC inverted. Start your Thermomix at 5mins/70'/Sp 4. Slowly pour the water phase onto the top of the lid. When you are adding the water, add it slowly to start with and then you can speed it up, just like a mayonnaise. You want it all to mix for another couple of minutes after you have incorporated all of the water.
- When it is finished it is very runny, nothing like a cream. Don't fear! Pour it into your sterilised containers and let it set with the lid off. Make sure you wash your bowl, lid, MC and butterfly in hot soapy water immediately. When I make moisturiser I actually pop these all (minus the blades) in the dishwasher.
- It is best to keep your cream away from sunlight and only use clean hands to dip into it. If not using straight away, keep refrigerated.

